A.I personal trainer - build your first A.I app with Python and LM Studio!
Leverage the latest advancements in A.I and learn how to run LLM's on your local machine for free!
Curious Software Developer about all things Java and Python! Currently working as a Backend Software Engineer managing multiple microservices developed with Spring Boot 3 and Java 21.
Introduction
The artificial intelligence hype is REAL! If you are a techie, you probably feel assaulted by articles about it every time you open your poison capsule social media of choice.
I am a software engineer for some years now but I don't have any expertise in the field of A.I. That needs to change! Let's build our first A.I enabled application together!
We'll use Python and Flask to create the backend of our web application and the minimal frontend will be put together using HTML, Tailwind CSS and HTMX. We'll use a free tool called LM Studio to download open source A.I models locally and run them with an HTTP server attached to simulate a real third-party A.I API integration.
IMPORTANT! This is a simple application created for fun. If you decide to use the workouts it generates, please consult with a medical doctor first! Don't trust everything it says because at the moment LLM's are prone to failures and misinformation. If you ultimately decide to use anything from this app, you do so at your own risk!
Installing LM Studio
In order to have our application fully running on our local machine, we need to run an LLM with a server attached to it capable of receiving and answering requests. There are multiple ways of doing this, but for today we'll use a free software called LM Studio. You can download it for Mac/Windows/Linux from their official website, after that the installation process should be a typical "next/next/finish" process.
Download and run LLMs locally using LM Studio
Now that we have LM Studio installed, we can actually run our first LLM entirely on our machine. When we open LM Studio we are greeted with the following homepage:
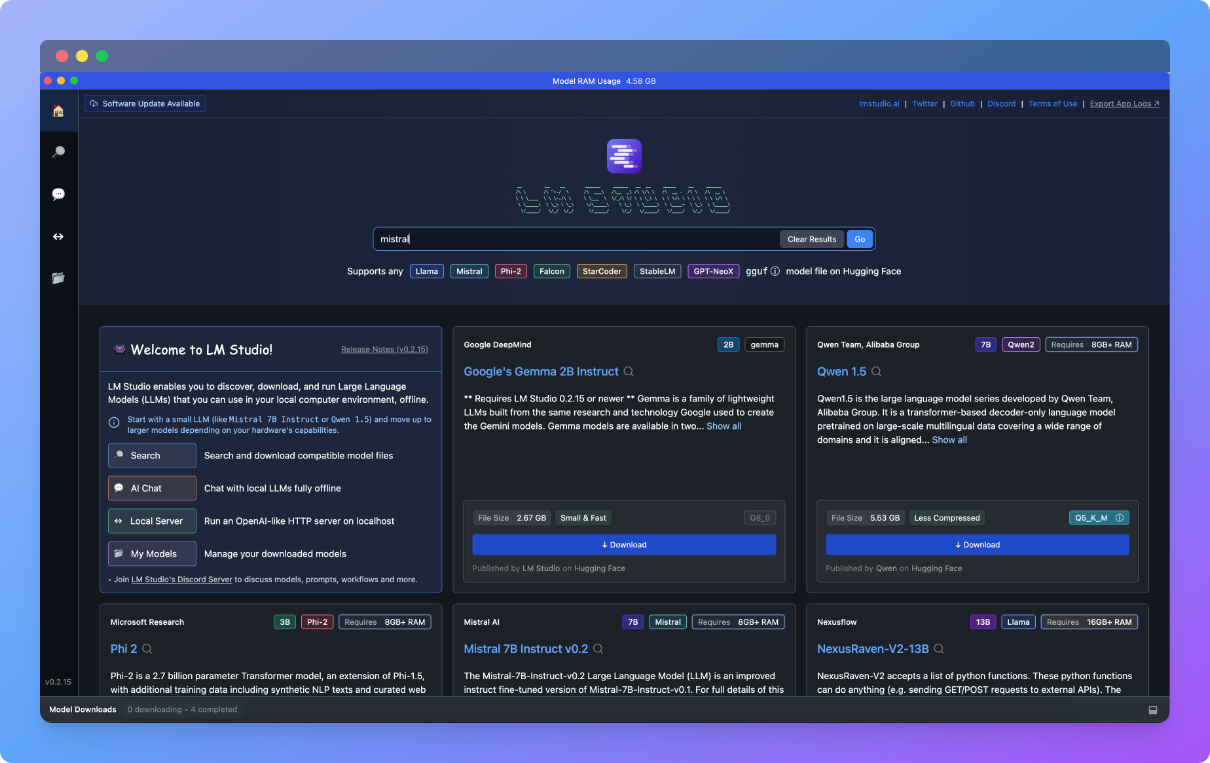
From here we can search and download all available models on HuggingFace, a huge repository for all things A.I, especially LLMs and datasets. Choosing the correct model for a specific use case is a science in itself, so for today I will just recommend something good enough for our tutorial, which is a Mistral AI model. Search for "mistral" in the LM Studio homepage search bar and you should find plenty of options. I'm trying to keep this tutorial straight forward so I'll just recommend the version I believe will work for most people, which is Mistral-7B-Instruct published by the very popular(in this community) TheBloke (many thanks for your work!). The specific iteration we want is called mistral-7b-instruct-v0.1.Q4_0.gguf, as you can see in the screenshot below:
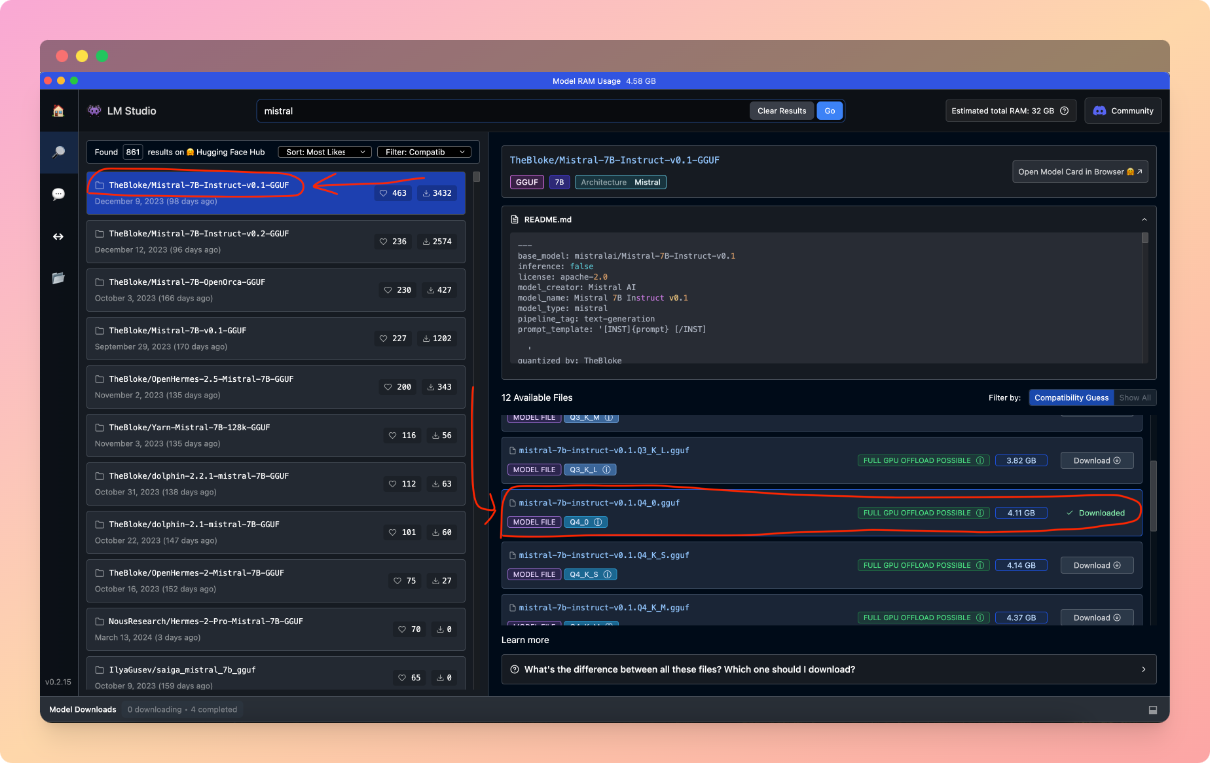
This model has a size of 4.11 GB and from my experience it will use somewhere around 4.4 GB of RAM, so make sure your machine has the available resources for it. The download might take a while, depending on your internet connection.
Note: If you're curious about the name
mistral-7b-instruct-v0.1.Q4_0.ggufand what the7b-instruct-v0.1.Q4_0part means, those numbers and letters tell us important details such as the amount of training parameters and quantization level. These are LLM specific terms and while they would matter if we had to choose a model to use in a real product with performance and cost in mind, they are not that relevant for our tutorial so it's best to skip over them for now. I do encourage you all to research this further!
Running the model locally with a server attached
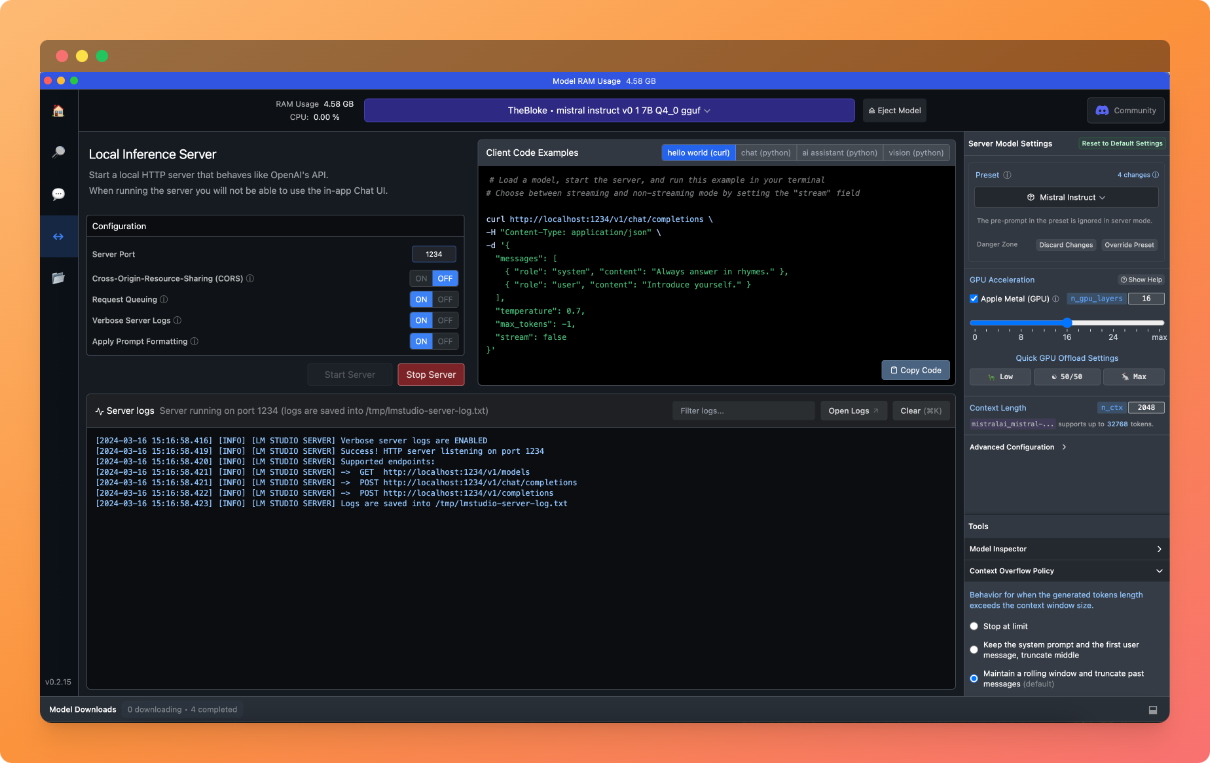
These days it's really hard to compete with big companies specialised in training A.I models so in a real world scenario, our application would probably interact with a third-party API(for example, OpenAI's GPT API) to leverage the best models out there for generating workouts. As any other API, this would mean making requests to a server and receiving a response. In our case we are using LM Studio to simulate this external API, so after the Mistral model download finishes, we can go to the "Server" section of LM Studio and start a local server by simply pressing the "Start Server" button. Here we'll also notice a Client Code Example which teaches key information about how the request to this server should look. You can see exactly what I'm talking about highlighted in the screenshot below:

Note: If you have a good GPU available, feel free to tick the
GPU Accelerationcheckbox available on theServer Model Settingsmenu on the right side of the LM Studio. This will run the model on your graphics card which results in a faster run.
Before you press the "Start Server", make sure you have the Mistral model selected in the top bar, as seen in the screenshot above. Once we press the "Start Server" button we should see our LLM with a server attached start pretty fast:
Great! Our work in LM Studio is done, you can minimise the window and move to the the coding part of this tutorial.
Coding our Python and Flask application
Python installation
Before you attempt to run the code from this tutorial, make sure you have Python installed locally(version 3.10 or newer).
Download the code from GitHub
The code for this project is available on my github. Feel free to clone it using git or just download the zip file.
Creating a virtual environment
Note: This step is not required if you are using PyCharm, as it will create and manage the virtual environment automatically.
I don't want to pollute your development environment with conflicting dependencies, so let's create a new virtual environment for this project. Open a command line in the folder where you cloned the repository and run the following commands to create and activate a new virtual environment:
python3 -m venv .venv
source .venv/bin/activate
Note: When you are done playing with this tutorial, you can exit this virtual environment by simply typing
deactivatein the command line.
Installing required packages
Now that we have a new virtual environment activated, we can install the packages needed to run the code(Flask, for ex.). There is a file called "requirements.txt" in the repo which contains a list of everything we need. Run the following command to install packages automatically:
pip3 install -r requirements.txt
How is the code working?
First of all, we need to initialise the Flask application in order to create a backend for our application:
# initialize Flask app
app = Flask(__name__)
The next step is to declare global variables to store our system prompt, headers and the LM Studio server endpoint:
# path to LM Studio server
LM_STUDIO_ENDPOINT = "http://localhost:1234/v1/chat/completions"
SYSTEM_PROMPT = """You are an experienced fitness trainer. You always create easy to follow workouts
                for your clients while prioritising the importance of warming up and stretching for injury prevention,
                strength training and cardio for the general health benefits. The response should be formatted using HTML paragraphs.
                Deny to answer any questions not related to fitness."""
HEADERS = {'Content-Type': 'application/json'}
The LM_STUDIO_ENDPOINT is the path leading to the server we created with LM Studio. We got this path from the Client Code Example LM Studio showed us when we started the server.
The SYSTEM_PROMPT will be used to precede all the instructions we send to the Mistral model. This helps the model "set the tone" so it know what kind of instructions to expect and how to best execute them. As you can see, we mention what the workouts should prioritise(injury prevention and general health), we ask the model to format the response using HTML tags(so we can insert the response straight into our page) and also we instruct it to only answer fitness related questions.
The HEADERS element is also required for a properly created request.
Next, we create the two endpoints for our application. One GET endpoint to render our HTML page(the app will have a minimal frontend):
@app.route('/', methods=['GET'])
def home():
    return render_template('index.html')
And the main POST endpoint which will be called by our frontend and is responsible for receiving the user input, creating the POST request to the LM Studio server and returning the A.I generated workout to the frontend:
@app.route('/workout', methods=['POST'])
def workout():
    # get input from user
    user_message = request.form.get('user_message')

    if not user_message:
        # validate input frm user exists or return error
        return jsonify({"error": "No user message provided"}), 400

    # Prepare payload for LM Studio API request
    # Add SYSTEM_PROMPT and the user_message which describes the desired workout
    payload = {
        "messages": [
            {"role": "system", "content": SYSTEM_PROMPT},
            {"role": "user", "content": user_message}
        ],
        "temperature": 0.7,
        "max_tokens": -1,  # unlimited length for the response. DON'T use in production!
        "stream": False
    }

    # Send the request to LM Studio server
    response = requests.post(LM_STUDIO_ENDPOINT,
                             json=payload,
                             headers=HEADERS)

    if response.status_code == 200:
        # Request to LM Studio server successful
        # Extract the text from the response
        response_data = response.json()
        # if response is present, return it to frontend
        content = response_data.get('choices')[0].get('message').get('content').strip()
        generated_text = content if response_data.get(
            'choices') else "No response generated"
        return generated_text
    else:
        # Request to LM Studio server unsuccessful
        return jsonify({"error": "No response from LM Studio"}), response.status_code
Finally, the templates/index.html file contains our minimal frontend. It's a simple HTML page using Tailwind CSS for styling and HTMX for requests towards our backend. I won't go into details with this one because frontend is not at all my area of expertise(in fact, this code was generated using ChatGPT). Simply put, this code makes a request to our GET endpoint to render the initial page and after the user types the input describing the workout needed, it calls the POST endpoint and adds the HTML result to the page.
<!DOCTYPE html>
<html lang="en">
  <head>
    <meta charset="UTF-8" />
    <meta name="viewport" content="width=device-width, initial-scale=1.0" />
    <title>AI Fitness Trainer</title>
    <script src="https://cdn.tailwindcss.com"></script>
    <script src="https://unpkg.com/htmx.org"></script>
  </head>
  <body class="bg-gray-50">
    <div class="max-w-lg mx-auto my-10">
      <h2 class="text-2xl font-semibold text-gray-900">AI Fitness Trainer</h2>
      <form
        hx-post="/workout"
        hx-target="#response"
        hx-swap="innerHTML"
        hx-indicator="#loading"
        hx-trigger="submit"
      >
        <div class="mb-4">
          <label
            for="userMessage"
            class="block text-sm font-medium text-gray-700"
          >
            What workout do you need?
          </label>
          <input
            type="text"
            name="user_message"
            id="userMessage"
            required
            class="mt-1 px-2 focus:ring-indigo-500 focus:border-indigo-500 block
            w-full shadow-sm sm:text-sm border-gray-300 rounded-md"
          />
        </div>
        <button
          type="submit"
          class="inline-flex justify-center py-2 px-4 border border-transparent
          shadow-sm text-sm font-medium rounded-md text-white bg-indigo-600
          hover:bg-indigo-700 focus:outline-none focus:ring-2 focus:ring-offset-2
          focus:ring-indigo-500"
        >
          Generate workout
        </button>
      </form>
      <div id="loading" style="display: none" class="mt-4 text-gray-500">
        Generating workout...
      </div>
      <div id="response" class="mt-4"></div>
    </div>
    <script>
      document.body.addEventListener("htmx:beforeRequest", function (event) {
        document.getElementById("response").style.display = "none"; // remove old answer
        document.getElementById("loading").style.display = "block"; // Show the loading text
      });
      document.body.addEventListener("htmx:afterRequest", function (event) {
        document.getElementById("loading").style.display = "none"; // Hide the loading text once the request is complete
        document.getElementById("response").style.display = "block"; // display new answer
      });
    </script>
  </body>
</html>
Running the application
Ok, so we have an LM Studio server running, the code is downloaded, we created and activated a virtual environment and last but not least, we downloaded all the packages from the requirements.txt file! The only thing left is to run the code, so let's not waste any more time and start our application with the following command:
python3 main.py
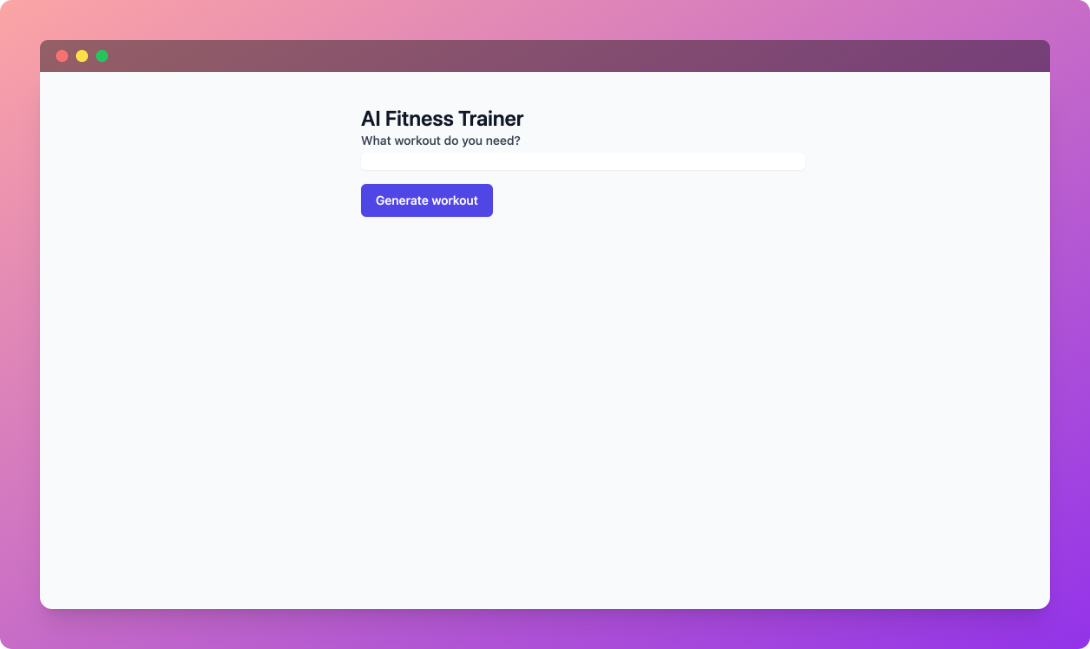
The application should start very fast and once we see the Press CTRL+C to quit message we should be good to go! Open a browser and access http://127.0.0.1:5000, you should be greeted by this page:
So let's see the application in action! Since it took me a while to write this article, I'm feeling a bit sore from all the sitting and typing. Let's see what kind of workout I can do from the comfort of my home.
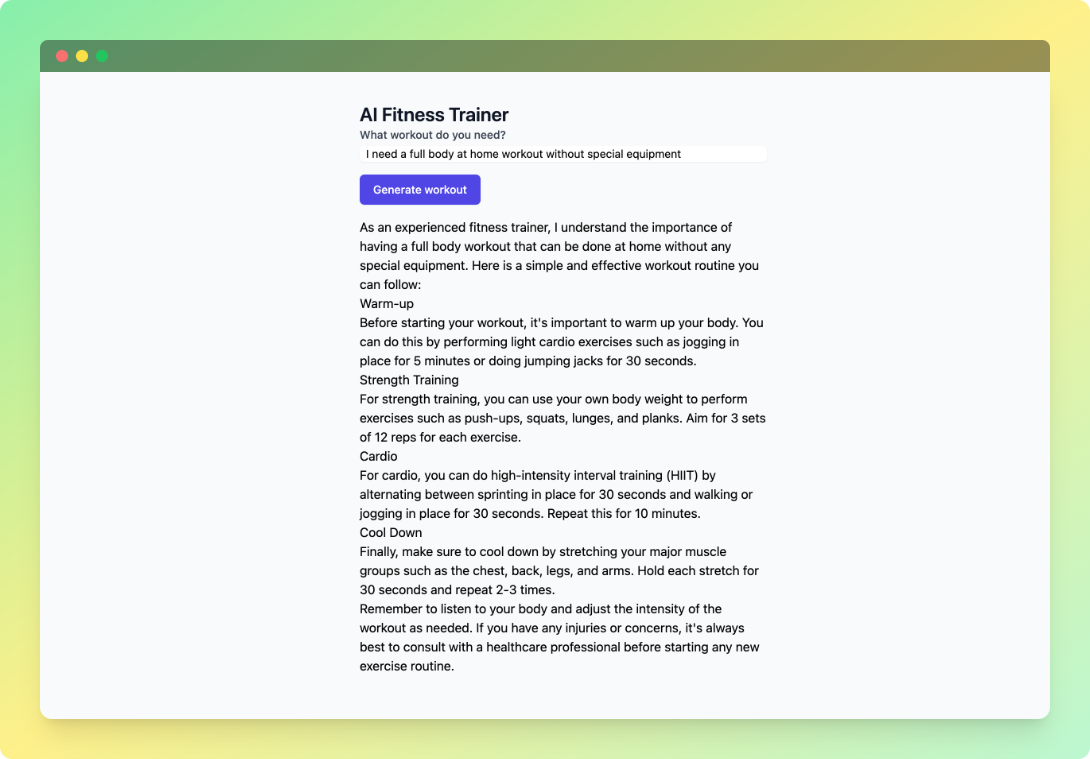
Important! These models are pretty taxing on your machine, so expect the workout generation to last from 15 seconds to maybe even minutes! You can monitor the LM Studio console and you'll see the logs in action and when it is finished.
Conclusions
Congratulations! You have just completed your first A.I enabled application! I hope you are as excited as I am!
Because this was a tutorial aimed at complete A.I beginners, we skipped many important details that would simply be overwhelming. In a real world scenario the model downloaded from the internet would ideally be fine-tuned using custom data, for example an expansive dataset of workouts for specific client needs. In our case, we didn't fine-tune our model at all because I simply wanted to help people experiment and start on this path(and most importantly, because I am just beginning as well and I am still learning a lot). Hopefully this tutorial will motivate you to start learning and researching the wonderful field that is artificial intelligence!
Cheers!